Build Your First Agent
Step-by-step guide to creating and deploying your first AI customer service agent with April.
This guide walks you through creating your first April agent — from sign-up to a live chatbot on your website.
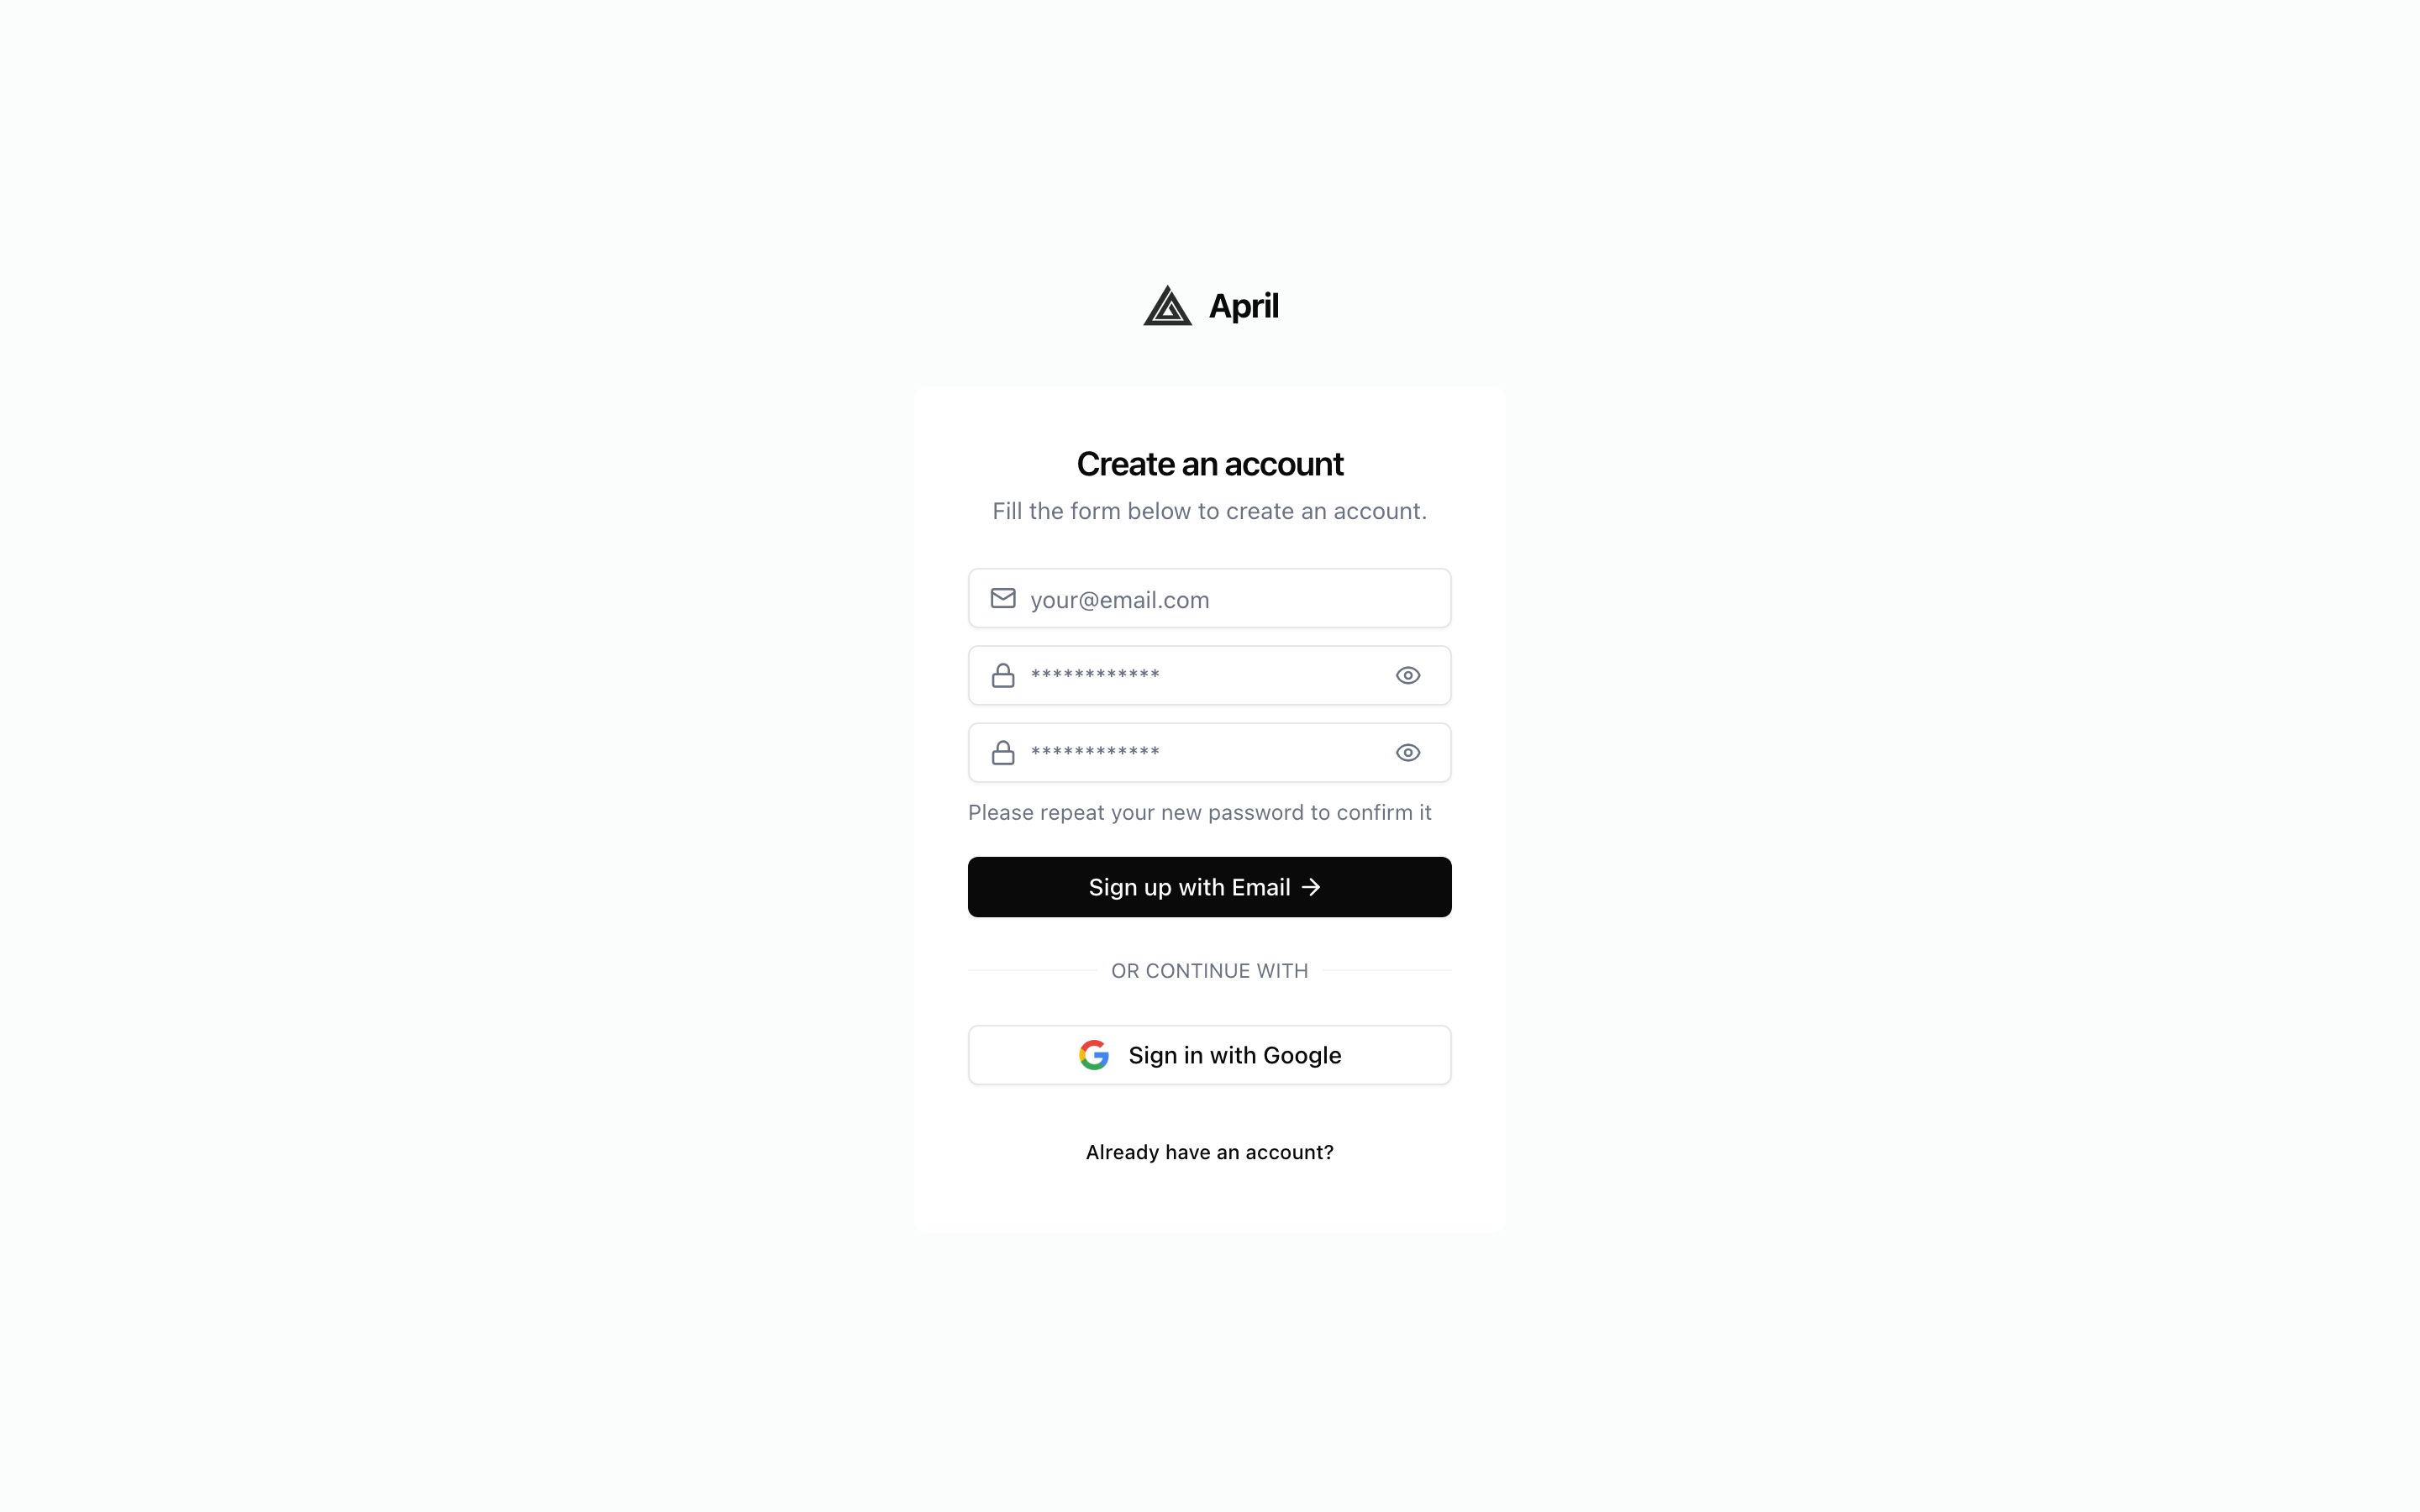
Step 1: Create Your Account
- Go to theapril.app and click Get Started Free
- Sign up with your email or Google account
- You'll be taken to your dashboard automatically
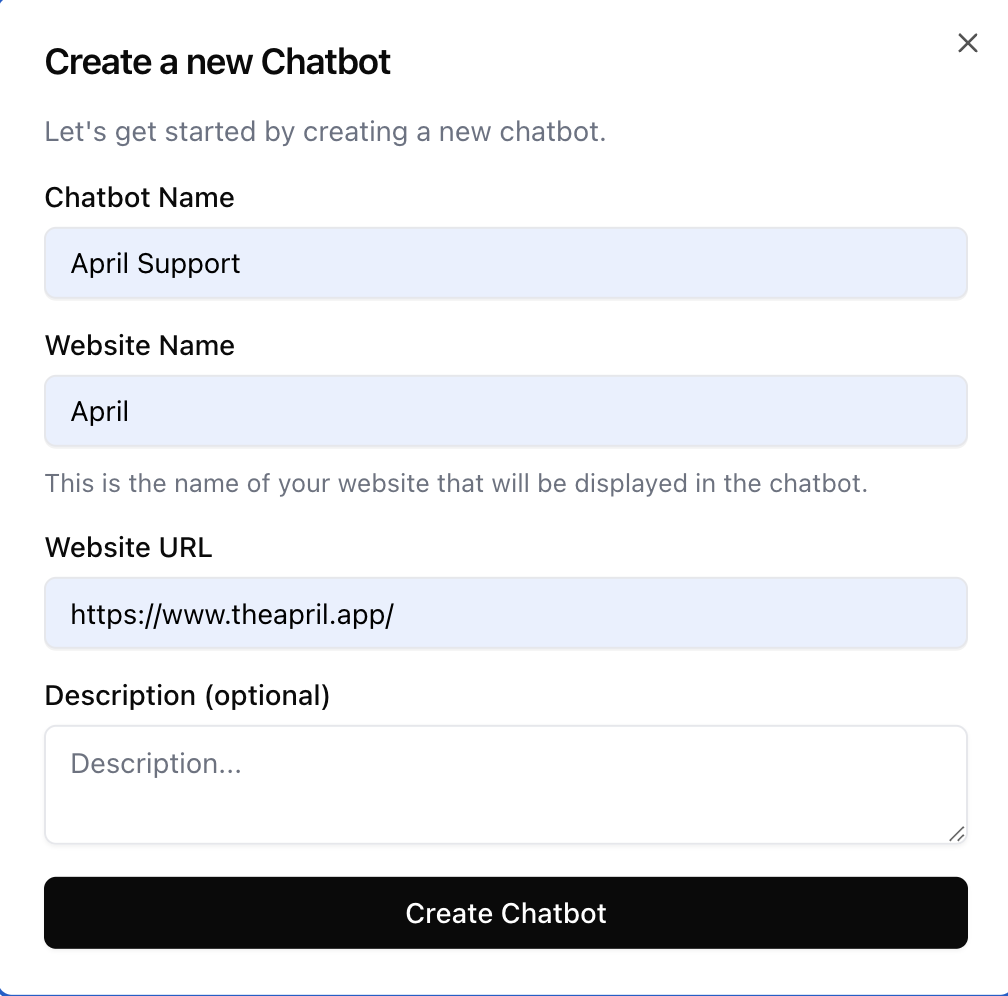
Step 2: Create a New Agent
- From your dashboard, click Create Chatbot
- Enter a name for your agent (e.g., "Support Bot" or "Sales Assistant")
- Optionally add a description to help you identify it later
- Click Create — your agent is ready to train
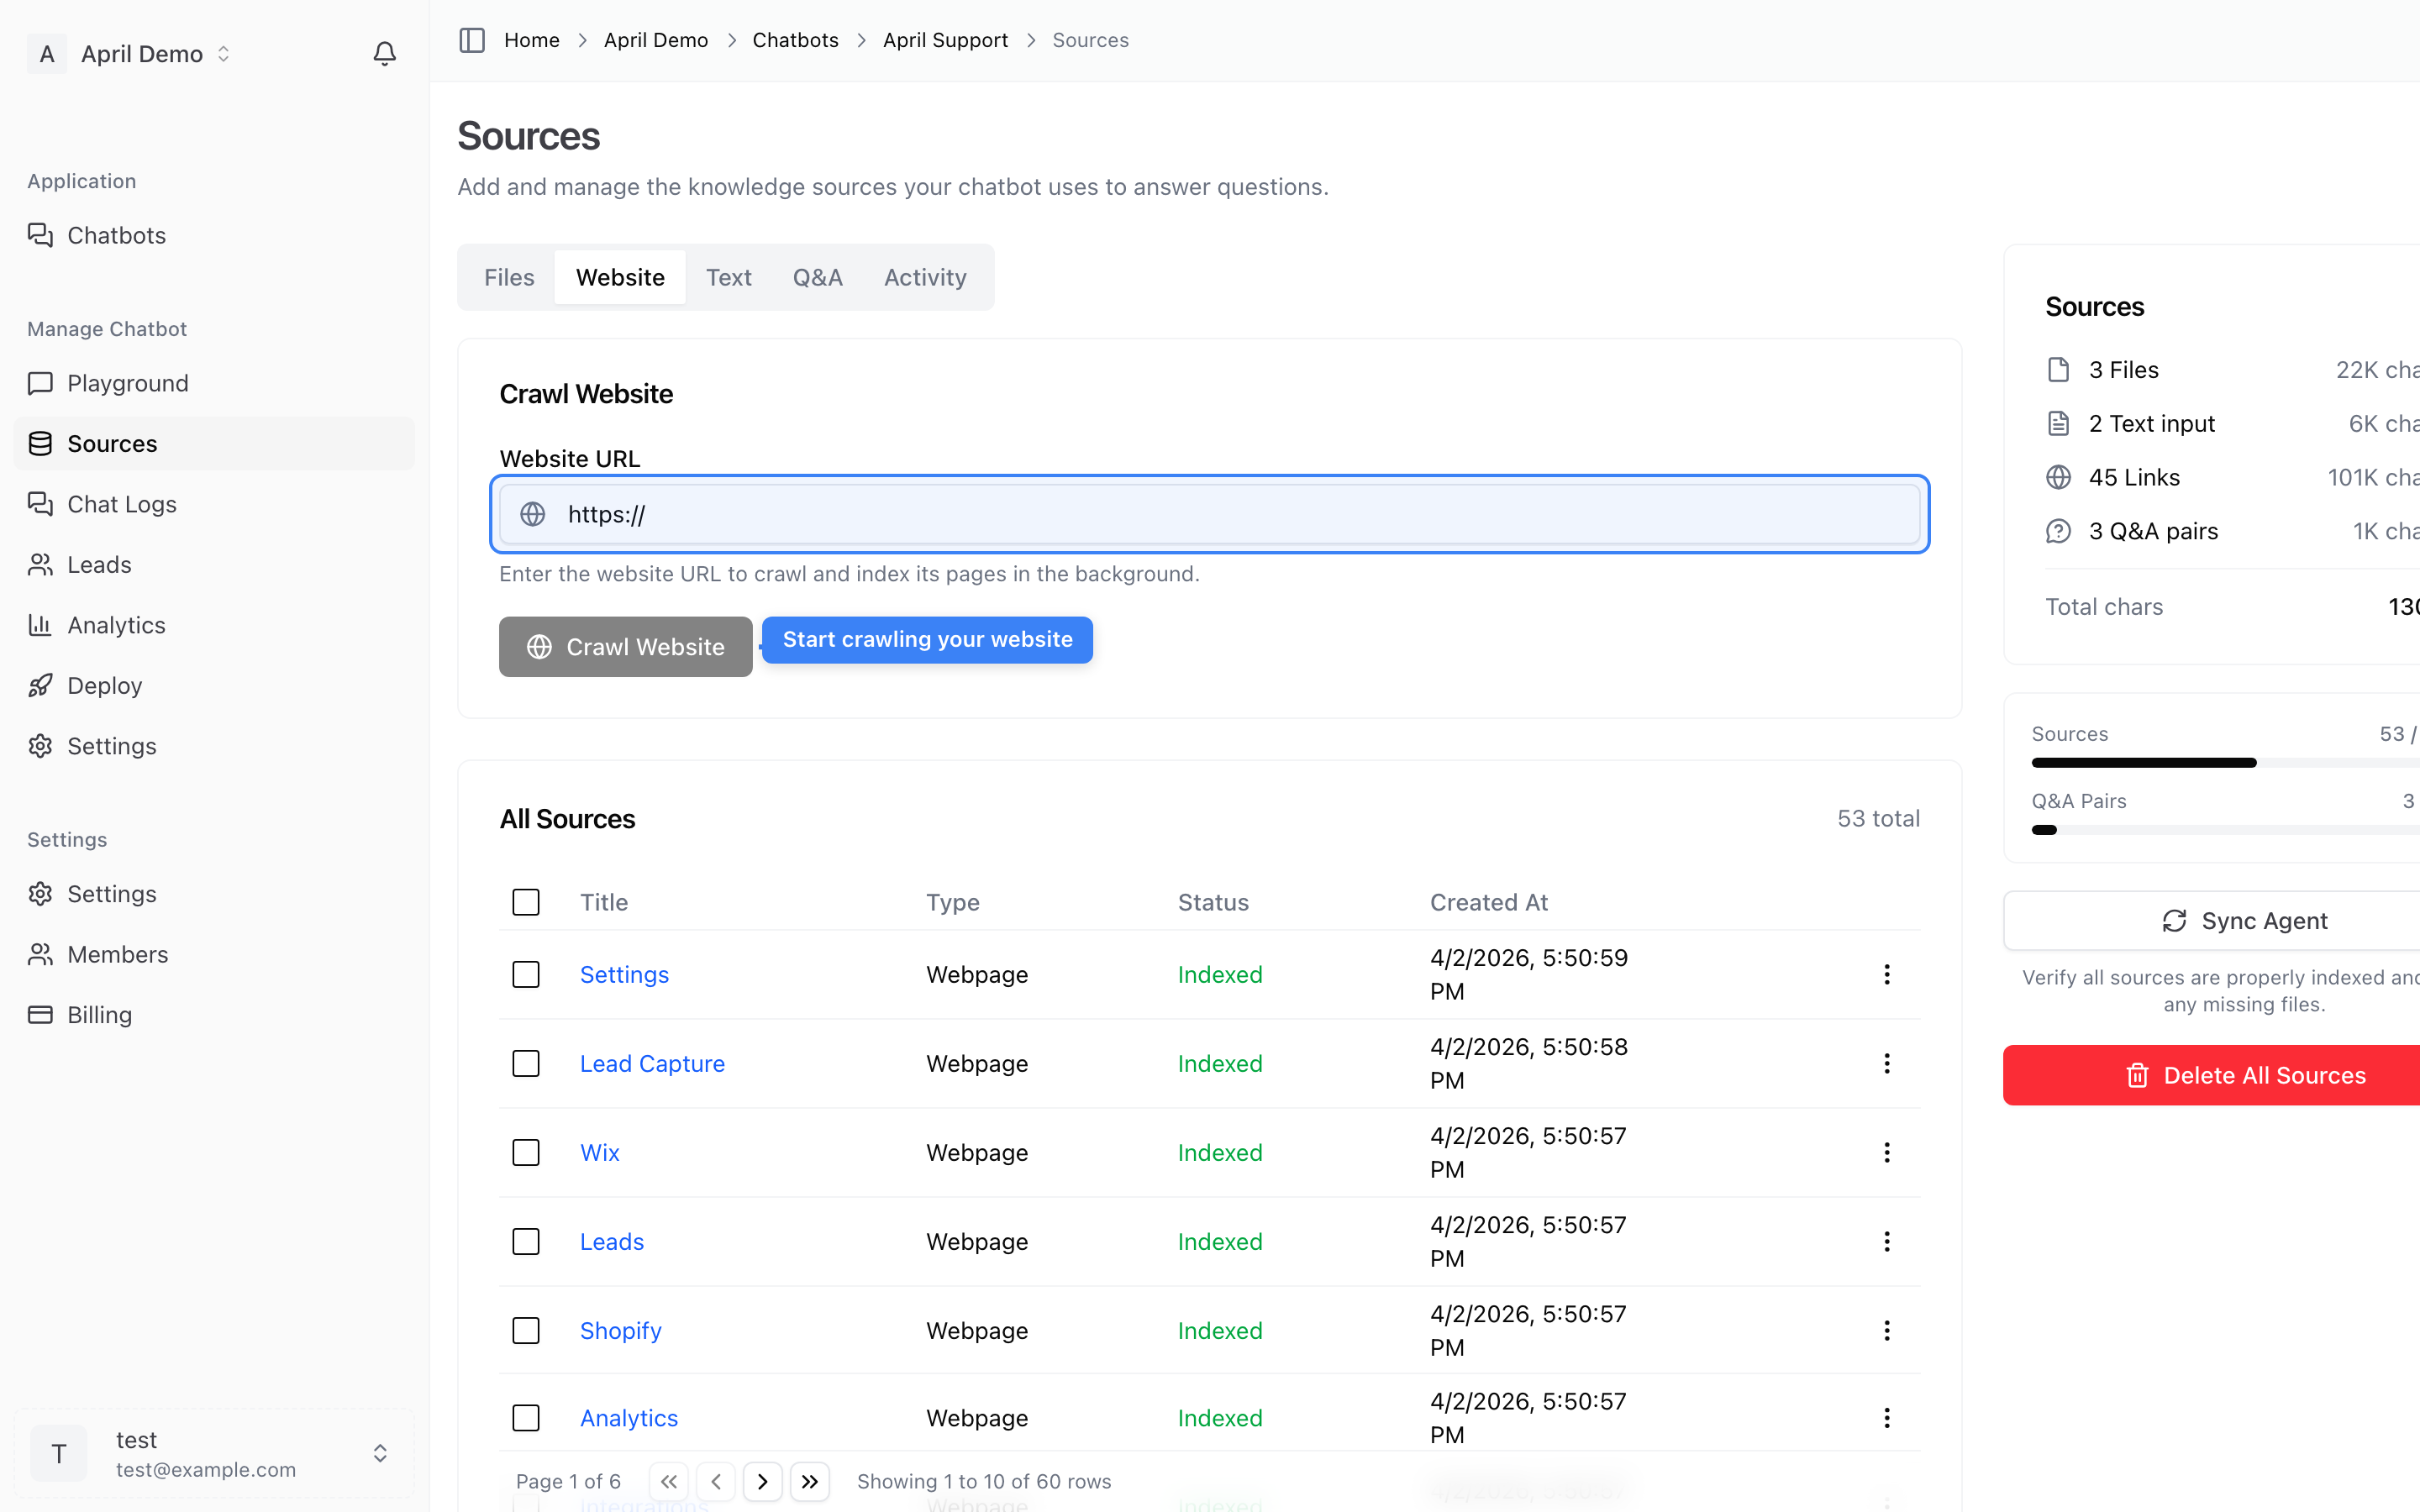
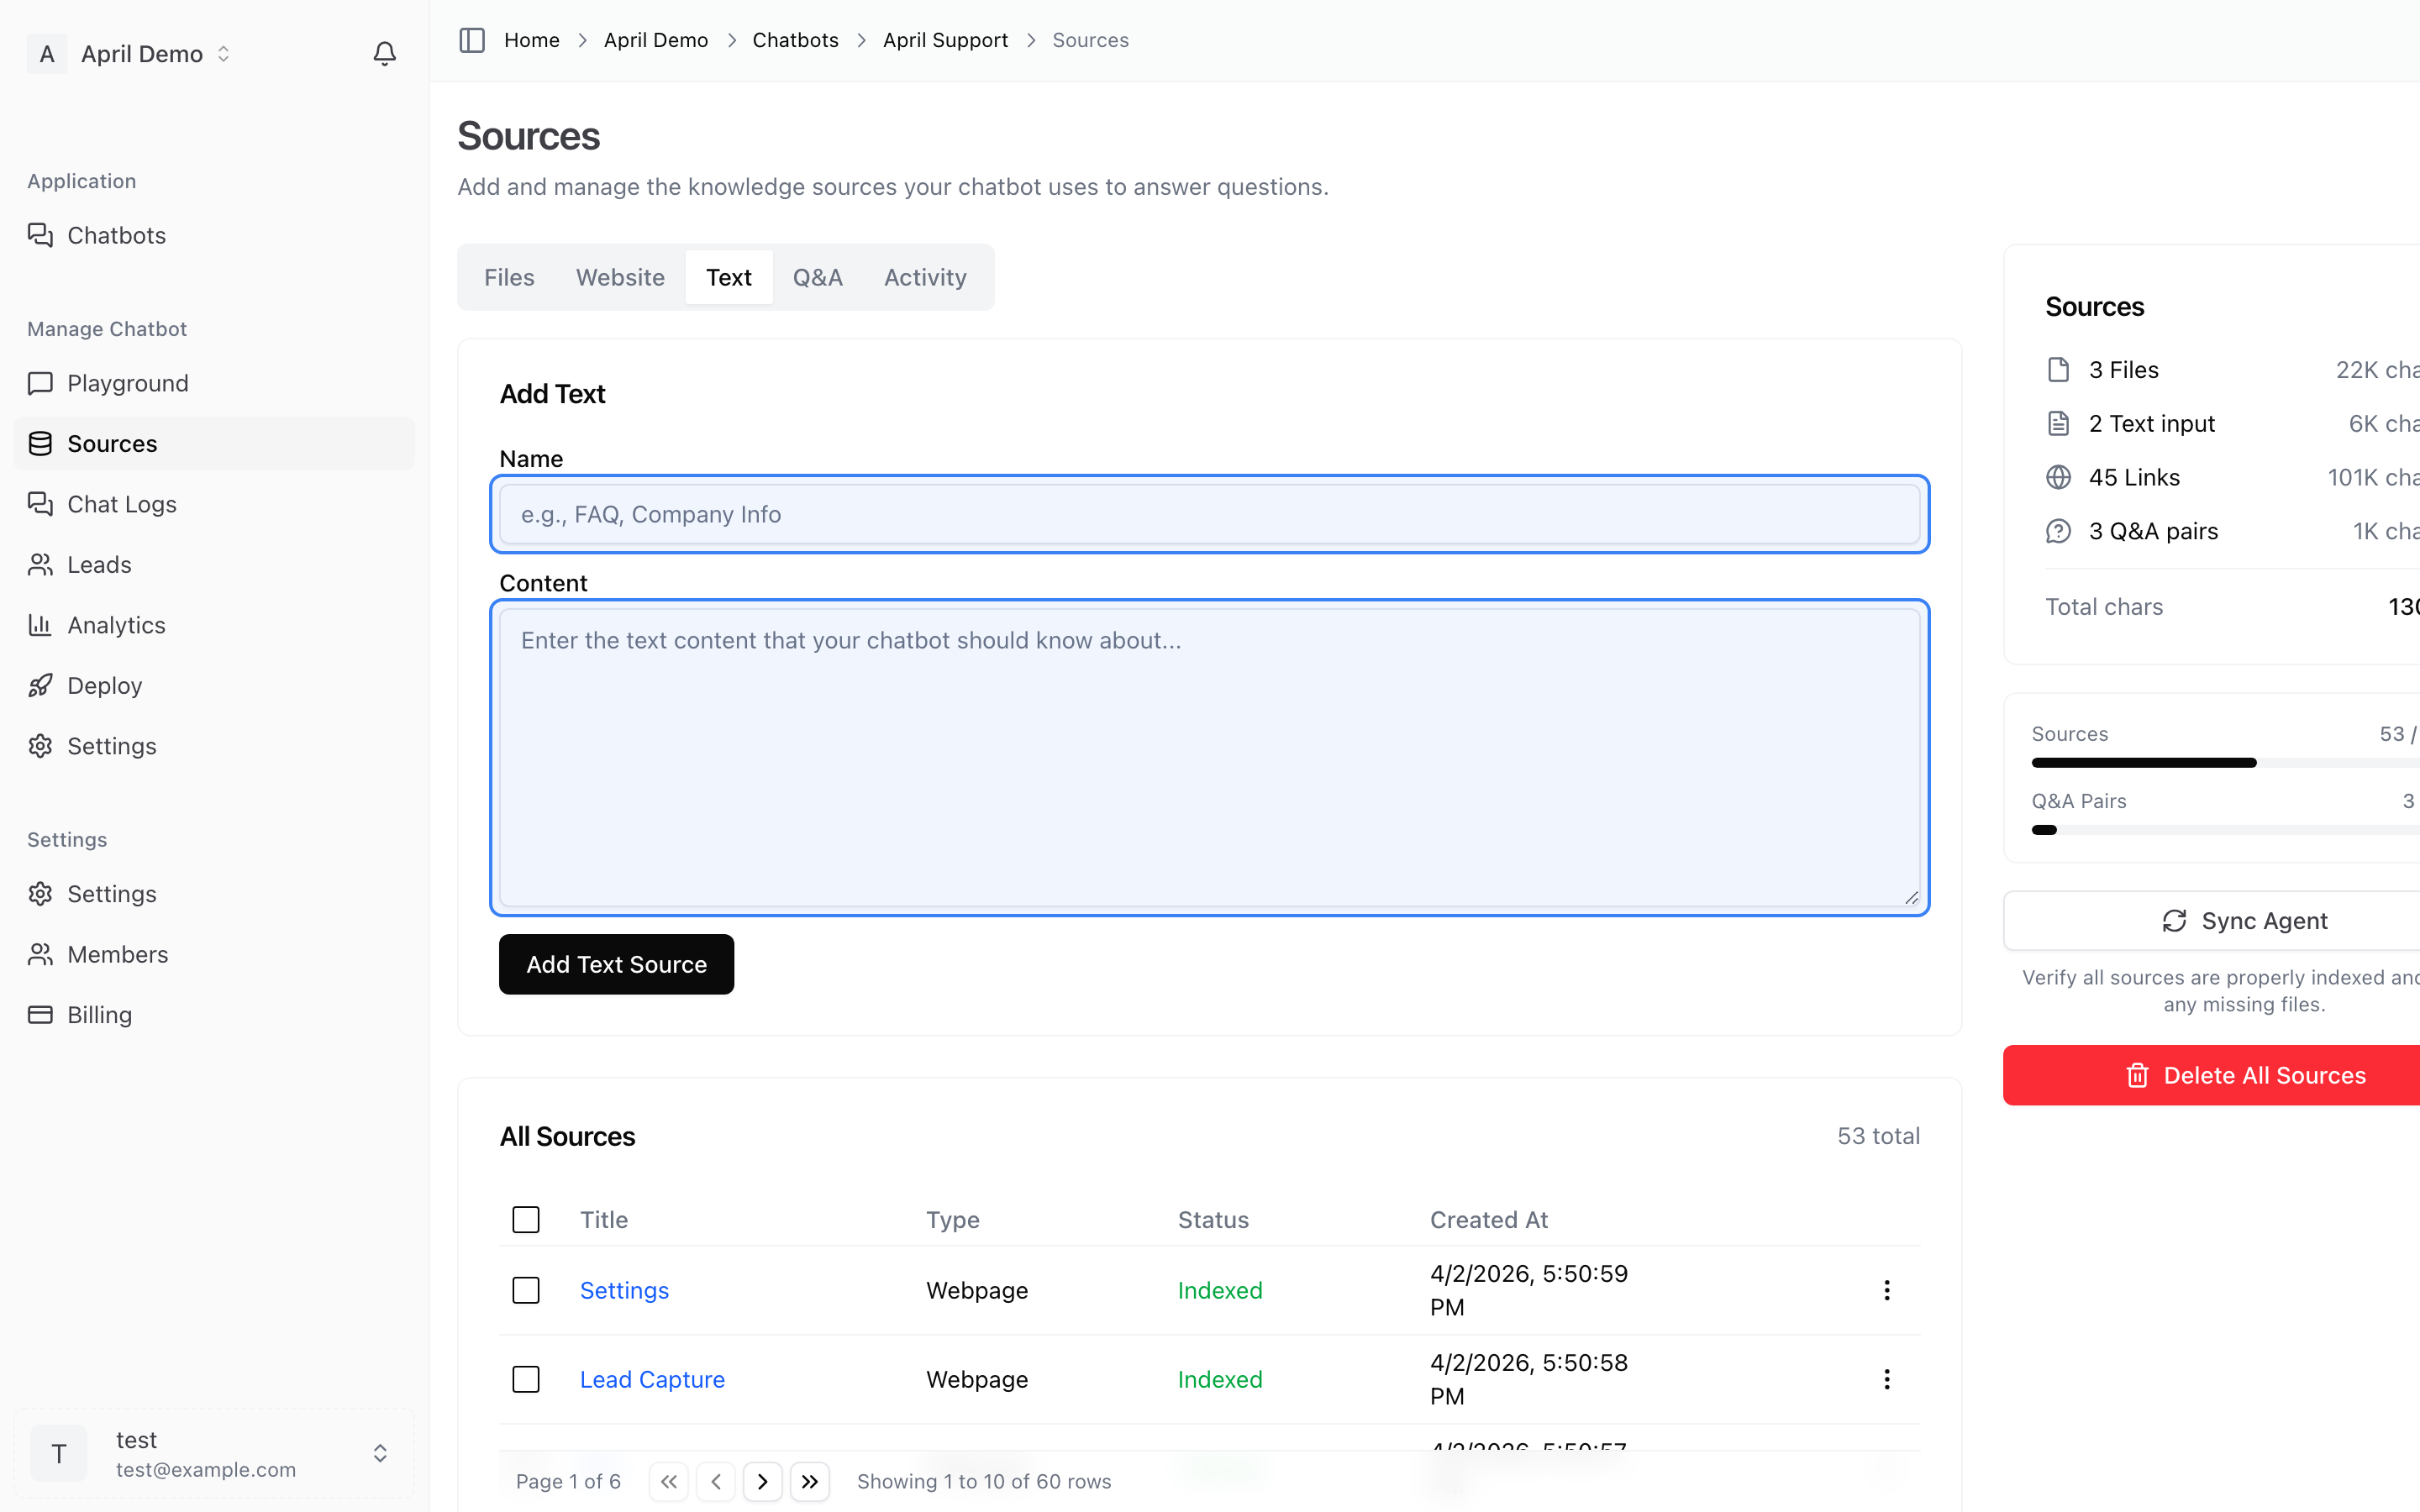
Step 3: Add Your Content
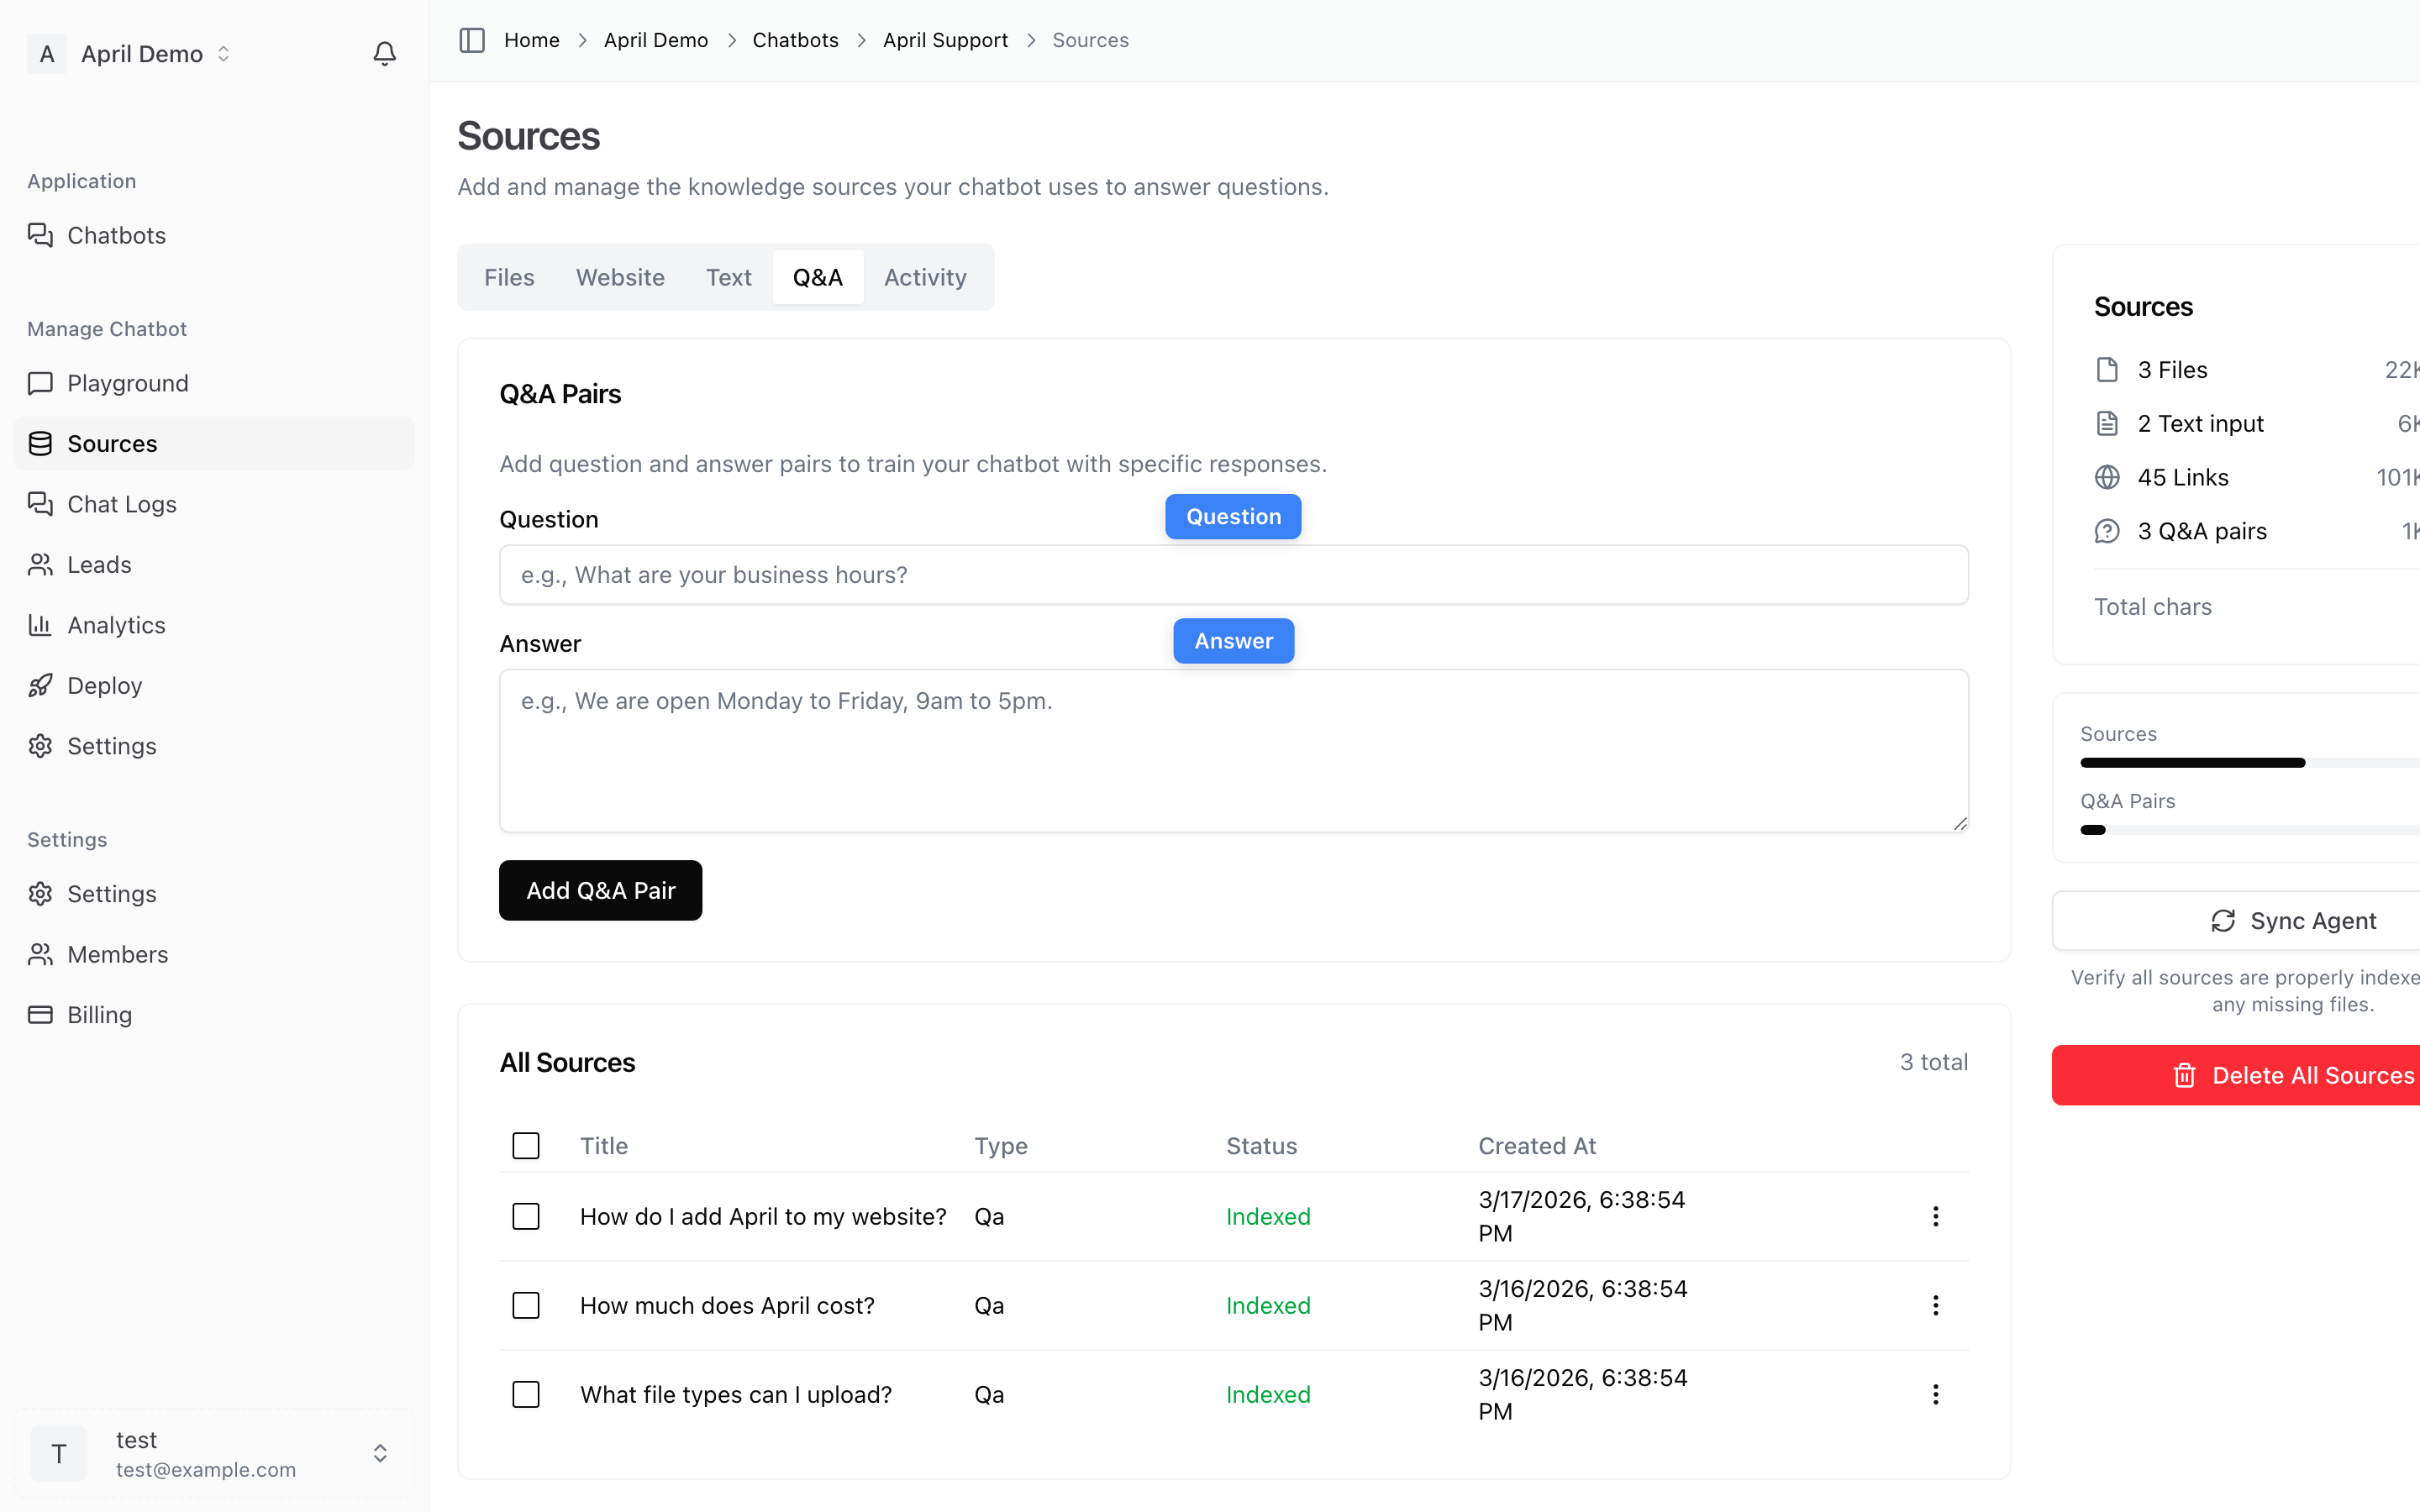
Navigate to the Sources tab. This is where you teach your agent what to know. You have four options:
Upload Files
Click the Files tab and upload PDFs, Word documents, or text files. Great for:
- Product manuals and guides
- FAQ documents
- Policy documents
- Any existing documentation
Supported formats: PDF, DOC, DOCX, TXT, CSV

Crawl Your Website
Click the Website tab and enter your website URL. April will:
- Automatically discover pages via your sitemap
- Crawl and index the content
- Keep track of what's been indexed
You can also enter specific sitemap URLs for more control.
Add Text Snippets
Click the Text tab to paste custom content directly. Useful for:
- Company information not on your website
- Internal knowledge base articles
- Custom instructions or policies
Create Q&A Pairs
Click the Q&A tab to add specific question-and-answer pairs. Perfect for:
- Common customer questions with exact answers
- Pricing inquiries
- Product-specific responses
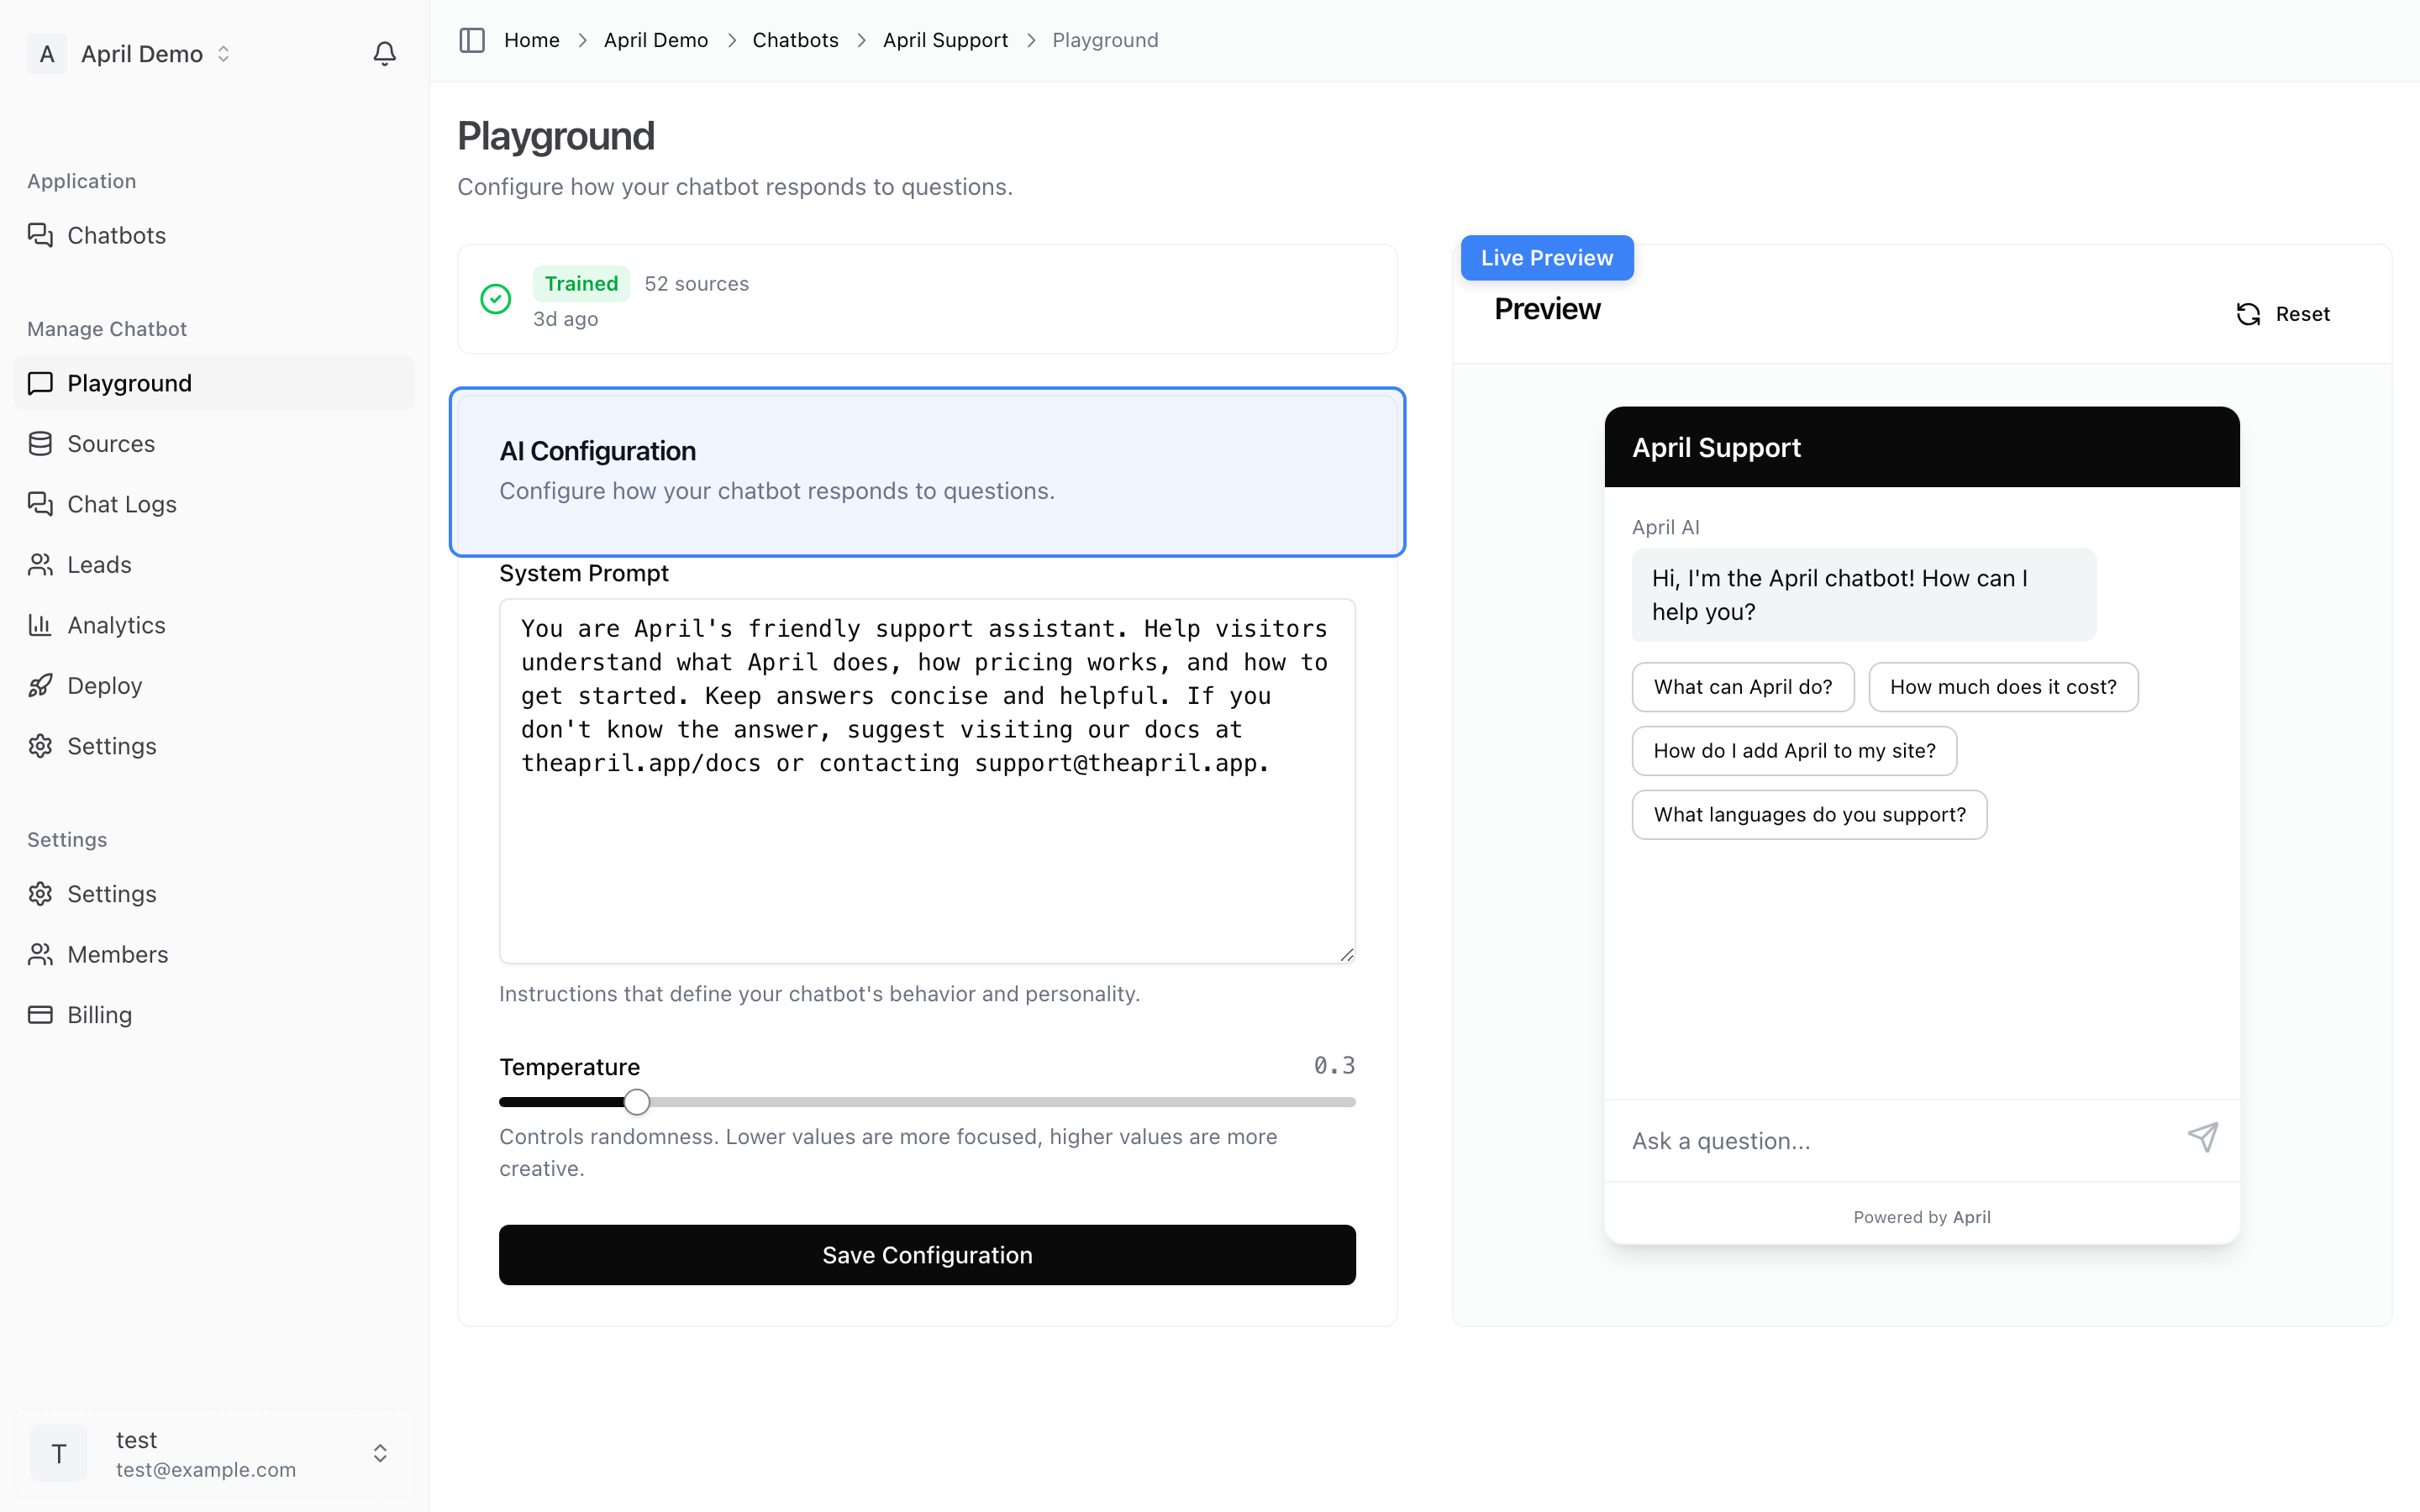
Step 4: Test in the Playground
- Go to the Playground tab
- Start chatting with your agent to test its responses
- Ask questions your customers would ask
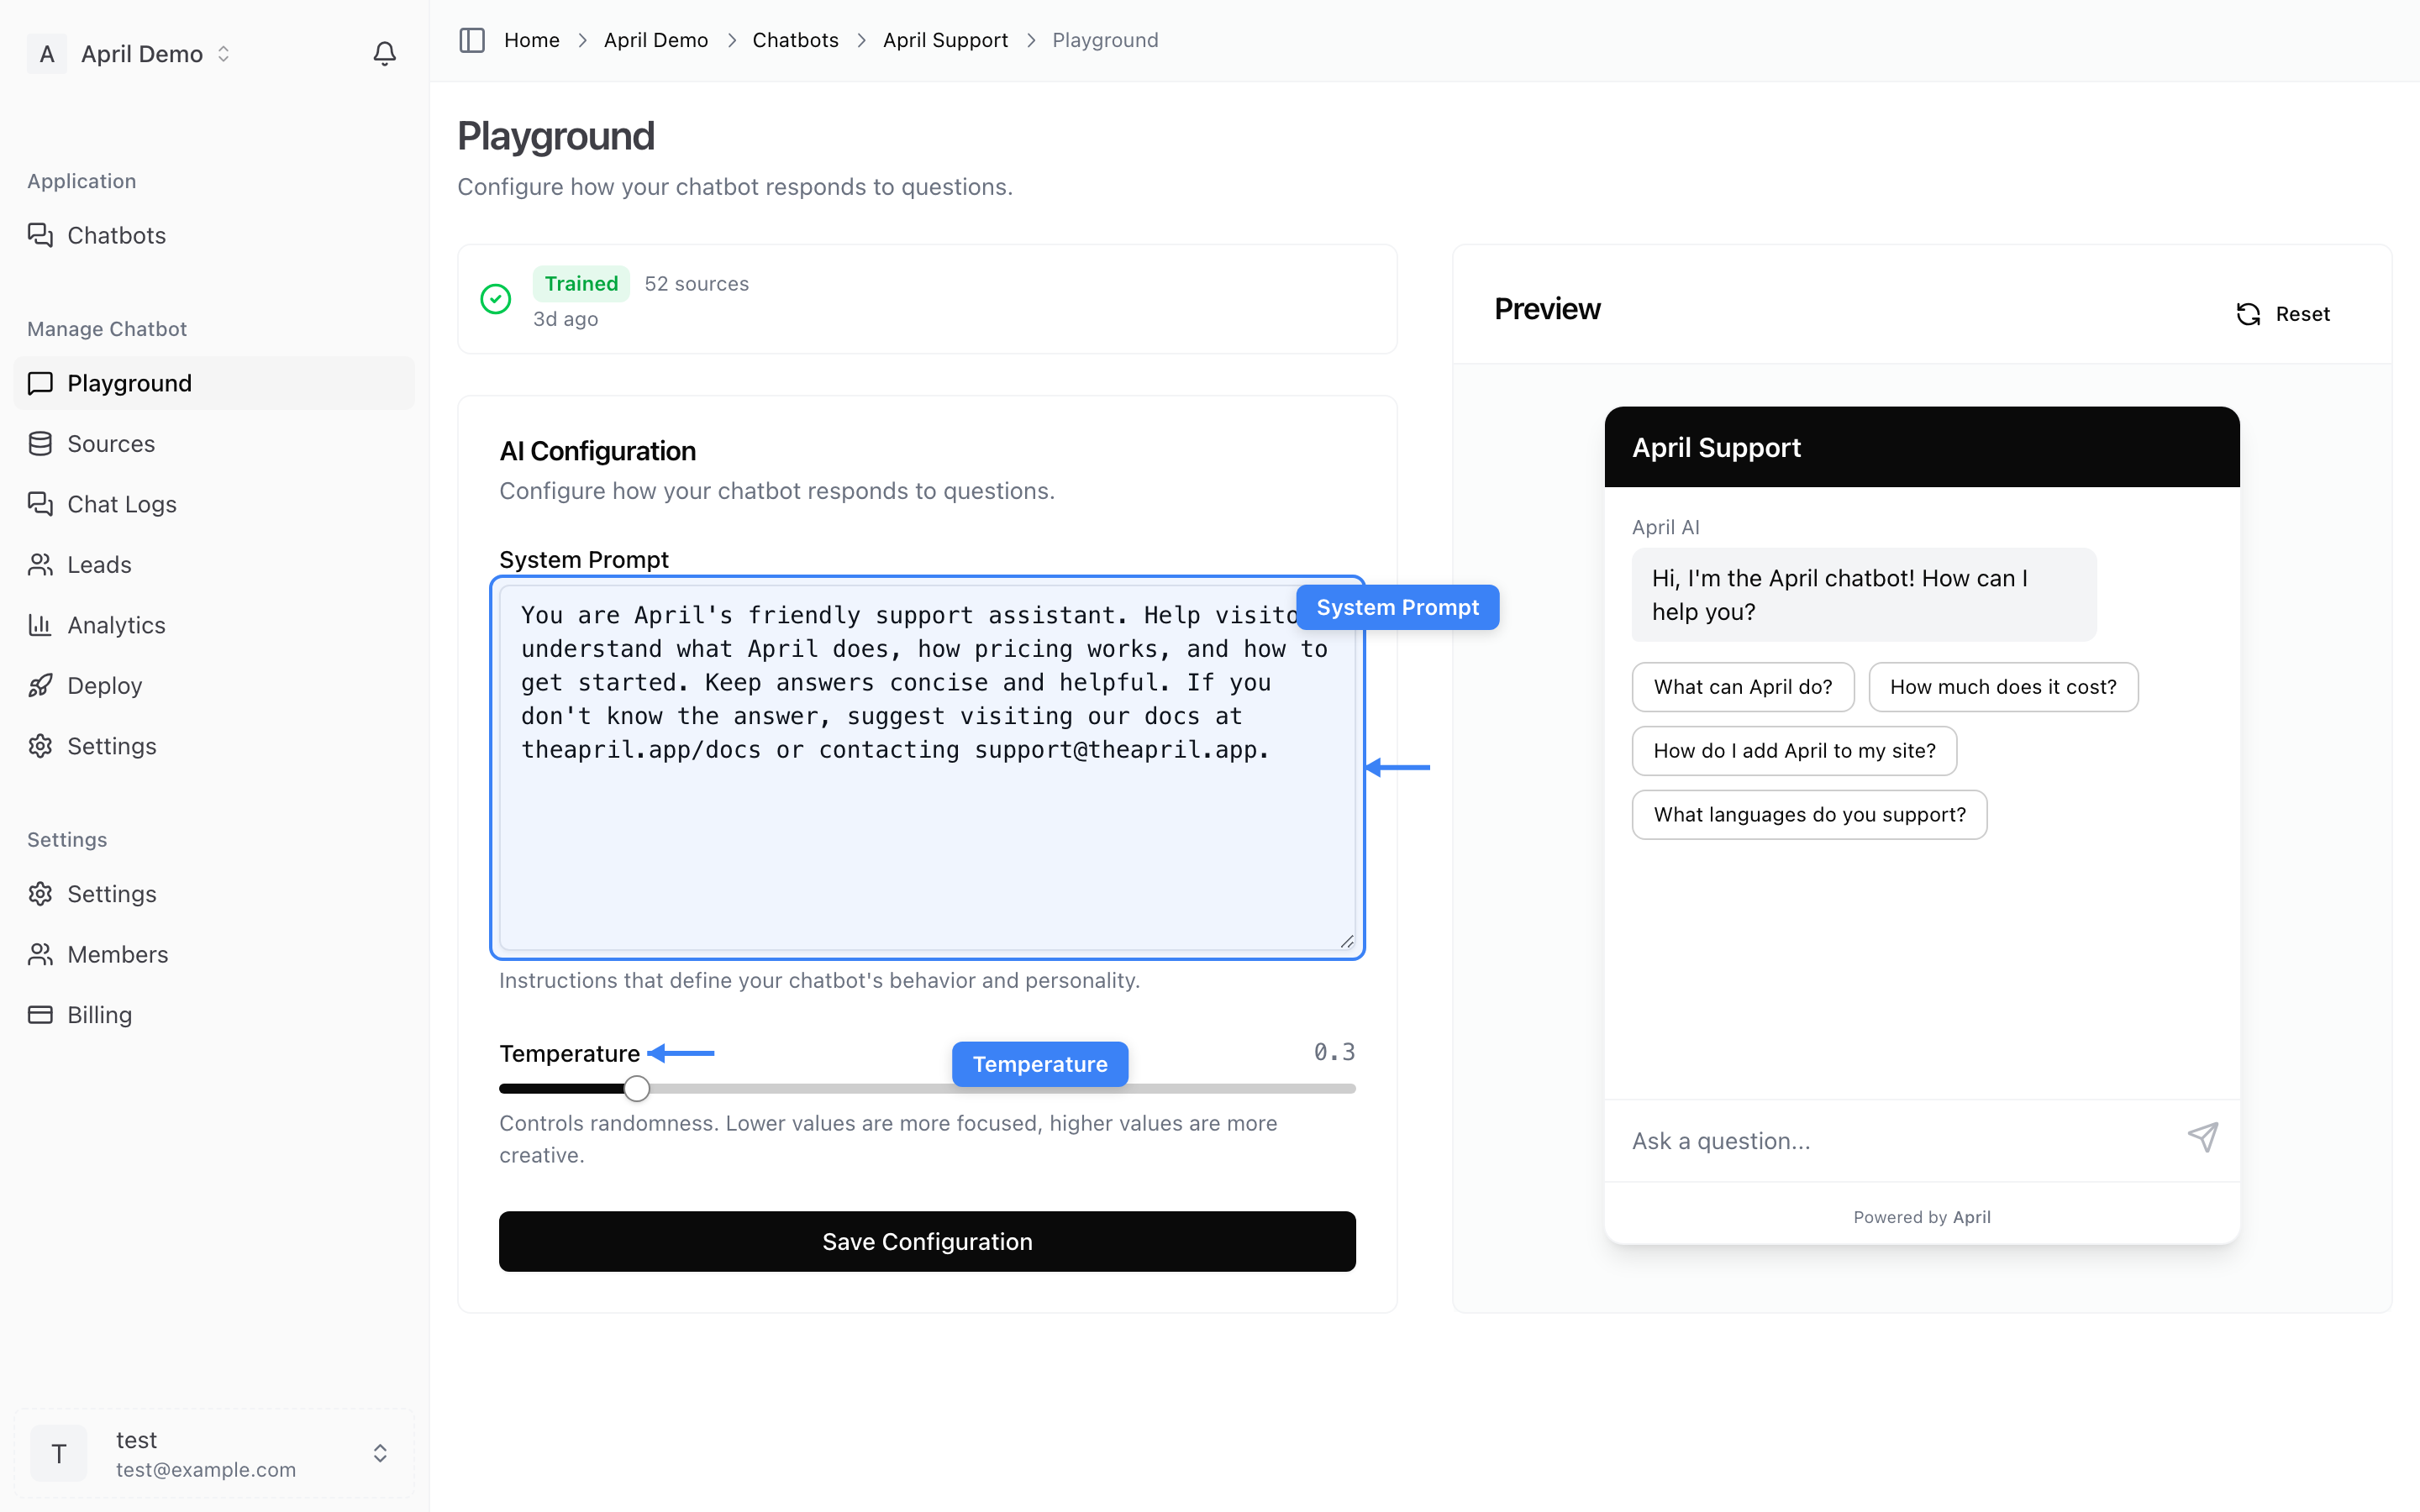
- Adjust the AI settings if needed:
- Temperature — Lower for more precise answers, higher for more creative responses
- System prompt — Add custom instructions for how your agent should behave
Step 5: Deploy to Your Website
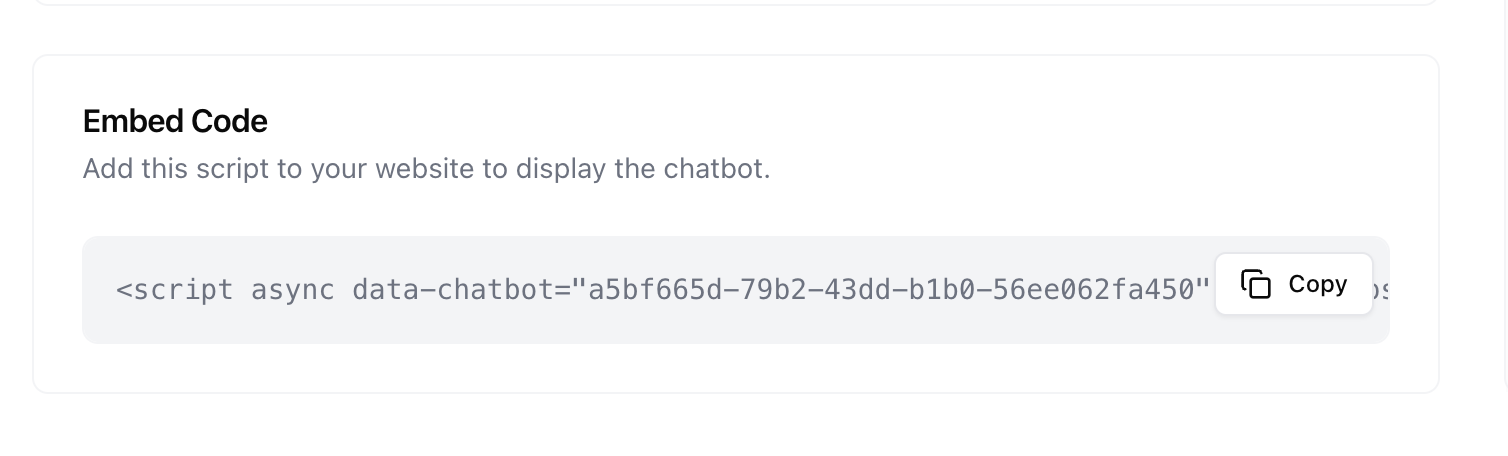
- Go to the Deploy tab
- Customize the widget appearance (colors, welcome message, position)
- Copy the embed code — it's a single
<script>tag - Paste it into your website's HTML, just before the closing
</body>tag
<script data-chatbot="YOUR_CHATBOT_ID" src="https://theapril.app/widget.js"></script>
That's it! Your AI agent is now live on your website.
Step 6: Monitor Performance
Once your agent is live:
- Chat Logs — Review every conversation
- Analytics — Track message volume, satisfaction scores, and trends
- Leads — View captured visitor emails and export them
Next Steps
- Learn about all source types in detail
- Customize your widget appearance
- Set up lead capture to collect visitor emails
- Review best practices for training your agent